Undoubtedly, Razer is the best label that processes high-end gaming peripherals for PCs. The company has an integrated program named Razer Synapse that deals with all your Razer devices including headsets, keyboards, controllers, mouse and so on. This integration is used to control and customize the settings of your Razer devices out there. From the information that we have gathered from the web, many Windows 10 users have reported Razer Synapse won’t open on Windows 10. If you are also undergoing this issue then you are not alone. But, the good news is that you can fix this annoying issue with much ease. Below, you will find the list of troubleshooting tips to fix the Razer Synapse issues.
Methods to Fix Razer Synapse Not Opening on Windows 10
Initially, as a basic workaround, we advised you to restart your system. If there are any minor glitches then they can be fixed just by restarting the system. After restarting the system, still the Razer Synapse not opening, then you can try the below-mentioned methods to resolve the issue. You are not required to try all of them, just work your way down until you find the method which meets your requirements. Let’s read them in detail!
Method 1: Uninstall and Reinstall Razer Device Drivers
If any of your Razer device drivers are outdated, missing, or corrupted, then Razer Synapse failed to start on Windows 10. For ensuring the smooth functioning of Razer devices, you need to rely on the most up-to-date drivers. The most promising way to resolve every driver-related query is by reinstalling the driver. Before initiating the reinstalling process, first, you need to uninstall the older or corrupted drivers. Below are the steps to uninstall the drivers for your Razer drivers.
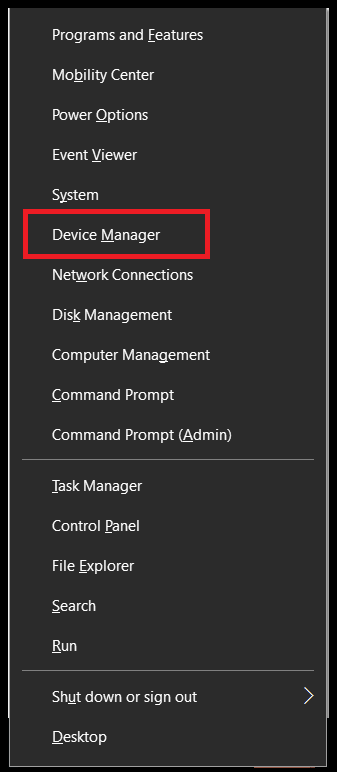
Simultaneously, press the Windows + X keys on your Keyboard.Then, choose Device Manager from the list that appears.
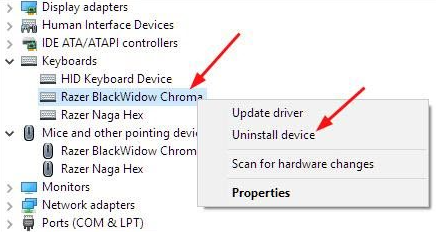
Next, you may find the Razer device under the Mice and Other Pointings, Human Interface Devices category.Right-click on your Razer Device and choose Uninstall device
Disconnect all the Razer devices from your system for approx 3 minutes.After a while, connect all the Razer devices to your system again. Windows will reinstall the drivers automatically.
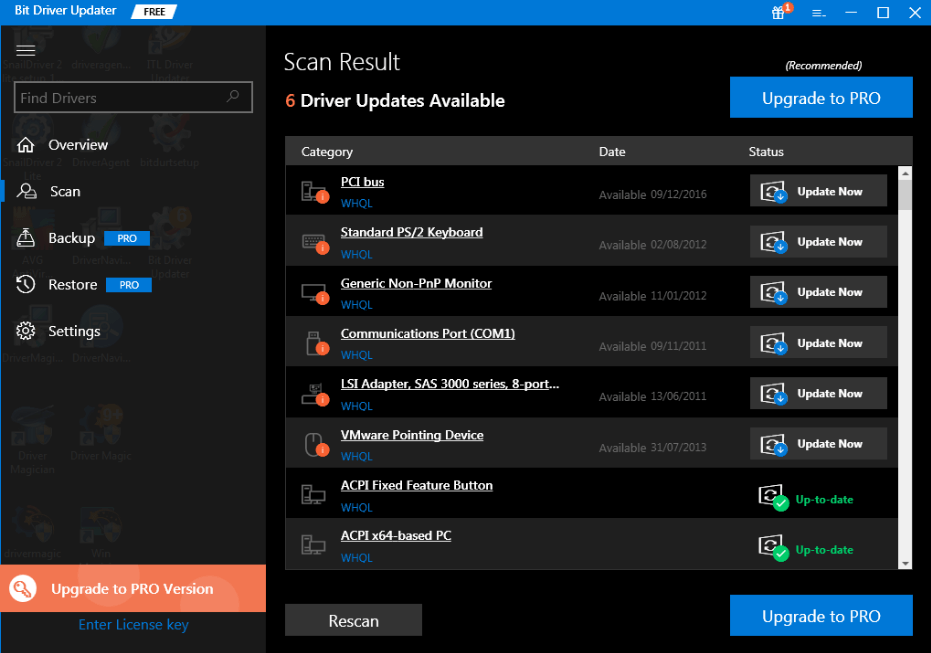
But, somehow, Windows fails in reinstalling the genuine drivers for your Razer device, then you can seek help from Bit Driver Updater. It is the best driver updater tool that can update and install Razer drivers automatically without any manual support. Apart from that, this driver updater tool lets you backup the older file of drivers, so if any mishappening occurs, then you can restore the older driver file. With this, you can bring back the effective performance of your system which is now responding to frequent failures. Have a look at the below mentioned easy steps to update drivers through Bit Driver Updater.
Get this much-needed utility tool from the download link below.
Run the setup-file to finish the installation.Double-click on the Bit Driver Updater icon on the desktop to open it.After this, wait until the scanning gets fulfilled.Review the list of outdated drivers and then click on the Update Now button waved next to the driver that needs an update.
If you rely on its pro version then, you can receive unlimited access to its high-level features. Apart from this, you get 24/7 technical assistance, complete refund policy, a one-click driver update, and other additional features such as schedule scan, backup & restore, etc.
Method 2: Close all the Razer Synapse Processes
Though it is hard to recognize the reason why the Razer synapse not opening on Windows 10, what we can do is provide you with the methods to resolve this issue. Many users claimed that closing all the Razer Synapse processes can resolve the issue. So, you can also give it a try. Here are the steps that you are required to follow!
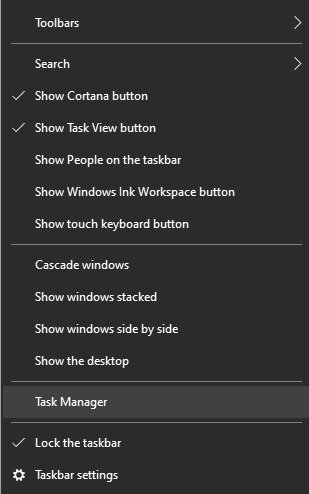
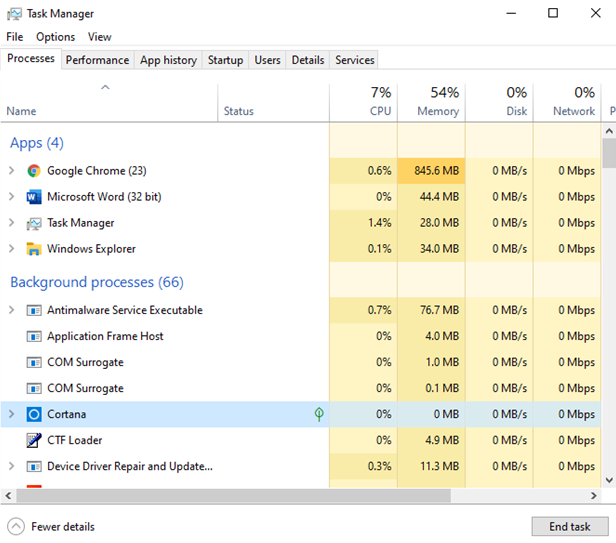
Click right on the taskbar and choose Task Manager from the context menu list.
Now, locate Razer processes and click on one Razer process.Then, on the bottom left edge find the End Task option and click on it. Close all the Razer processes in the same manner.
After this re-open the Razer Synapse just to see the Razer Synapse not launching problem solved or not. If it persists, then don’t worry just move onto the next troubleshooting method.
Method 3: Disable Windows Defender Firewall/ Third-Party Antivirus
Totally agree that security solutions are designed to protect us against viruses, malware, and other threats. But, sometimes, these antivirus solutions can freeze the Razer Synapse. Therefore, disabling the anti-virus solutions or Windows Defender Firewall temporarily can fix the Razer Synapse not starting issue. And, the below step-to-step guide will help you to disable the Windows Defender Firewall.
On your keyboard, press Windows and R keys at the same time, then write Control in the box and press Enter key.
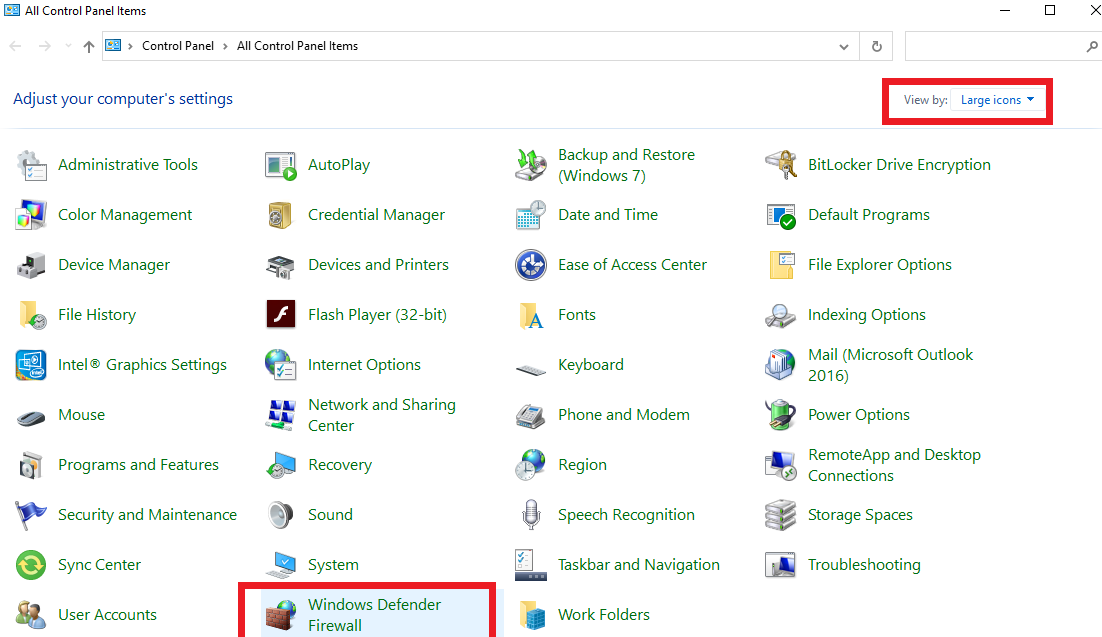
The above action will launch the Control Panel window.Now, set the view by as Large Icons.Work your way down to detect and launch the Windows Defender Firewall.
In the next window, choose the Turn Windows Defender Firewall on or off option.
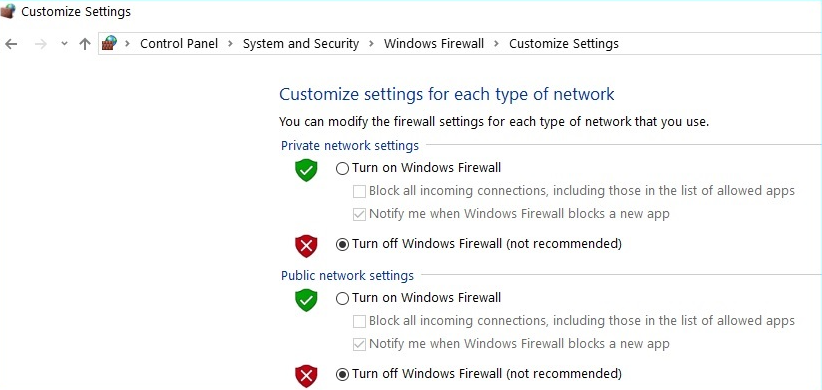
Select the Turn off Windows Defender Firewall option under both Public Network Settings and Private Network Settings.Lastly, click on the OK option.
Tech-Tip: Don’t forget to enable the Windows Defender Firewall once Razer Synapse successfully launched.
Method 4: Check For Windows Updates
Sometimes, because of the old and faulty version of Windows, you encounter issues such as Razer Synapse not opening. Therefore, always be sure to have the latest Windows 10 version installed. Use the following steps to install the latest Windows 10 version.
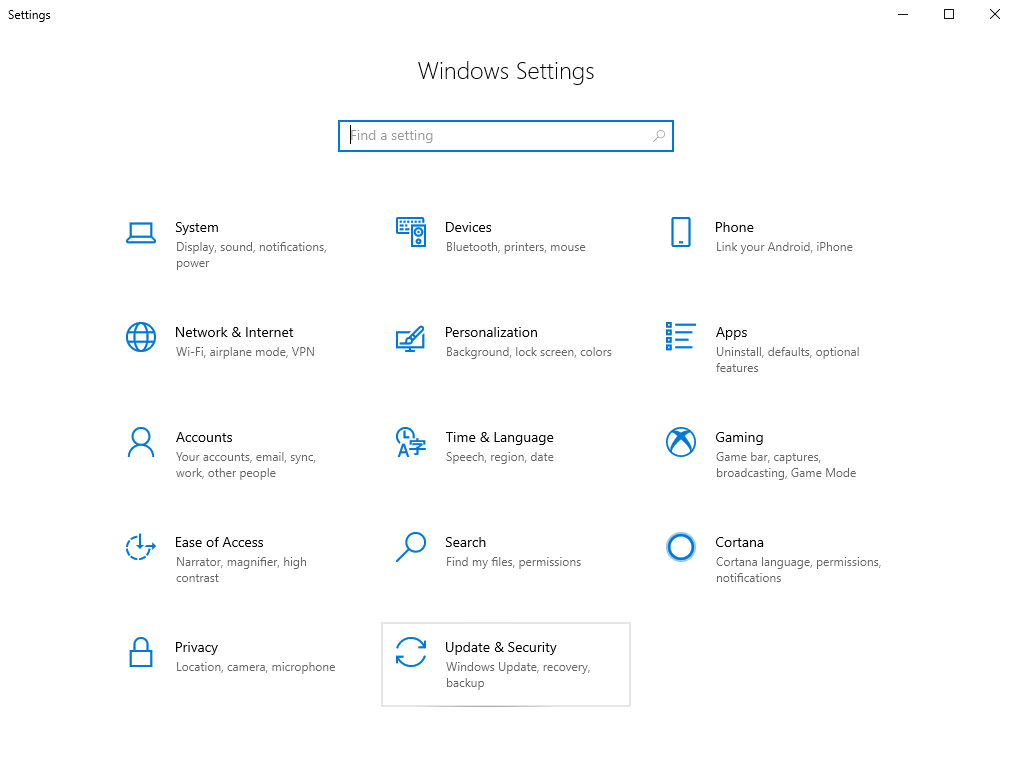
Summon Windows Settings.Click on Update & Security option.
In the subsequent prompt, click on the Check For Updates option.
Now, Windows will start checking your system for new updates. If any update is available then Windows will automatically install it.
Method 5: Reinstall Razer Synapse on your system
After trying the above easy yet productive methods, still, Razer Synapse failed to start, then you have the only option which is – reinstall the Razer Synapse. So, for reinstalling the Razer Synapse, you will need to follow the instructions shared below.
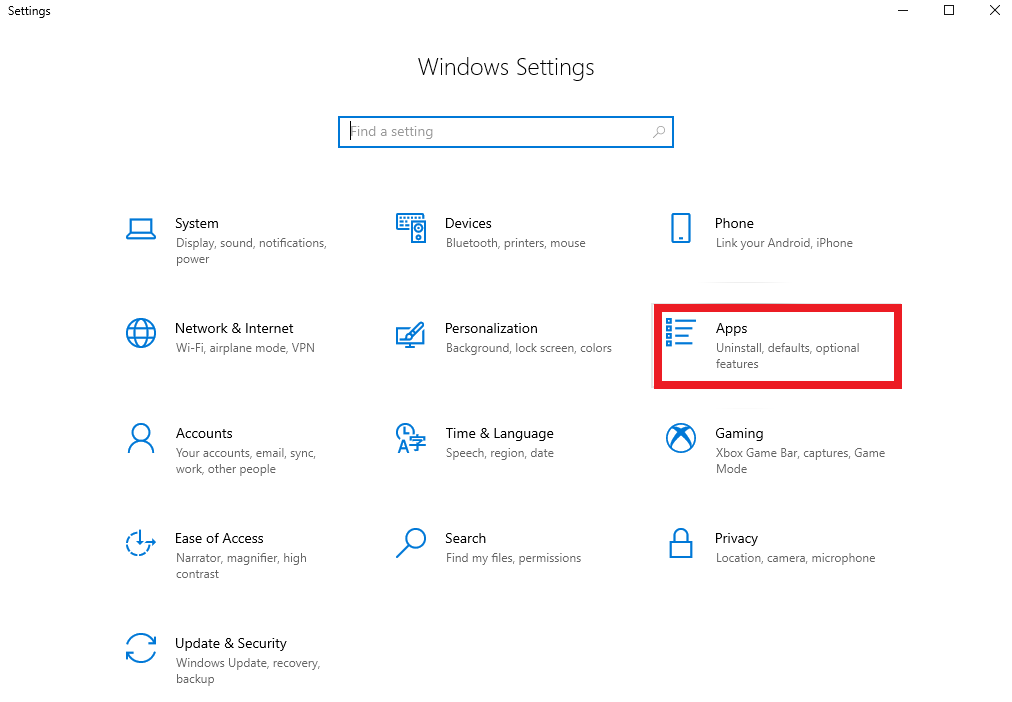
On your Keyboard, quickly press the Windows logo and I key to invoke the Windows Settings.Next, look for Apps & Features and click on it.
This will take you to the Apps & Features page, now find and click Razer synapse to choose Uninstall option.Wait for a while to get the uninstallation completed, later on, visit the official website of Razer to download the most up-to-date version of Razer Synapse. Install the downloaded file and run the Razer Synapse just to check it is functioning without any problem or not.
Also Read: How to Update Drivers on Windows 10,8,7 – Update Device Drivers
Razer Synapse Not Opening on Windows 10 – FIXED
Hopefully, after executing the above methods you are no longer encountering Razer Synapse not opening issues. In this post, we’ve explained the 5 easiest yet effective methods to help you out. However, you do not need to try all of them, just keep reading on until you find the one that works best for you. Drop your feedback in the box below and let us know which method fits your case. At last, before you go, if you liked the post then sign-up for our Newsletter for receiving more such write-ups shortly.
