Ethernet is the best way for someone who likes an undisrupted internet connection. But in order to ensure that your LAN cable works smoothly on your PC, correct drivers are necessary. Generally, these Ethernet drivers come pre-loaded on your computer system. But, for some reason, they have either become corrupted or gone missing. In that case, you need to download accurate drivers on your PC to experience an uninterrupted and stable internet connection. In this blog post, we are going to discuss the three most convenient methods that you can use to find, download and install Ethernet drivers for your Windows operating system.
Methods to Download, Install and Update Ethernet Driver on Windows 11, 10, 8, 7
Before you start, just be sure that you are connected to the Internet. If in case, your Ethernet is not functioning properly due to an outdated driver, we recommend you to connect to WiFi. Listed below are a few methods to perform Ethernet driver download and update for Windows PC, without any hassles.
Method 1: Manually Download Ethernet Drivers from Manufacturer
Installing the drivers manually by visiting the official website of your manufacturer is the best way to install reliable drivers on Windows PC. Intel, Lenovo, HP, Dell, Acer, and Asus are the top manufacturers. However, you must have the product details and Windows OS information to find genuine drivers. Here is how it’s done: Step 1: To get started, just visit the official site of your manufacturer. Step 2: Then, go to the Support and then Driver Download Page. Step 3: Search for your product and choose the compatible driver file for it. Step 4: Choose the correct Windows OS version and click on Download. Step 5: Once downloaded, double-click on the file and follow the instructions on your screen to complete the process. Lastly, reboot your computer to validate the recent changes in your system. Also Read: Realtek Ethernet Controller Driver Download & Install for Windows
Method 2: Update Ethernet Drivers in Device Manager
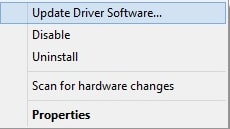
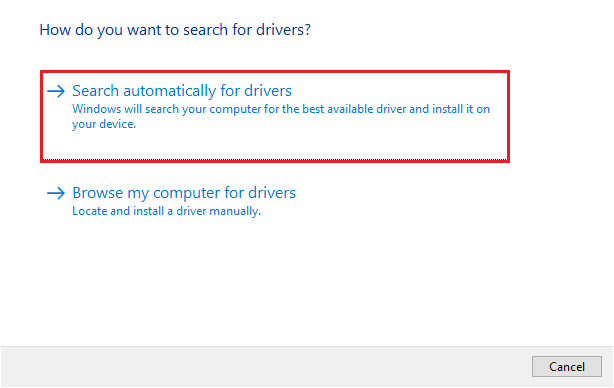
Windows comes with a default tool named Device Manager that manages all the connected hardware devices and their drivers. So, you can update Ethernet drivers via Device Manager. To use this tool, you simply need to follow the steps below: Step 1: On your keyboard, press the Windows and X keys together. Then, choose Device Manager from all available options. Step 2: In the Device Manager window, find and double click on the Network adapters category. Step 3: Right-click on your Ethernet driver and choose Update Driver Software. Step 4: From another prompt, select Search Automatically for Updated Driver Software. Now, wait for the Device Manager to find and install the latest available Ethernet driver updates for your Windows PC. Once everything is done, reboot your computer to save the recently updated drivers. Also Read: Fix: Ethernet Doesn’t Have a Valid IP Configuration
Method 3: Use Bit Driver Updater to Automatically Install Ethernet Drivers (Recommended)
If you think that the process of installing the Ethernet drivers manually is too risky and tiresome, then why not leave all the issues to Bit Driver Updater? Bit Driver Updater is the best driver updating software that automatically recognizes your Windows version and finds out the most compatible drivers for it. In just a couple of clicks of your mouse, Bit Driver Updater installs all the necessary PC drivers on your machine. With the help of Bit Driver Updater, you can also resolve the other Windows-related issues & errors like BSOD (Blue Screen of Death). Following are the significant reasons to use Bit Driver Updater:
An in-built scan scheduler saves you a lot of time.Automatically create a backup folder of older versions of drivers before upgrading, so you can hassle-free restore them if needed.The free version is available but with limited features.Huge driver database from authentic manufacturers.Installs only WHQL tested and certified drivers.
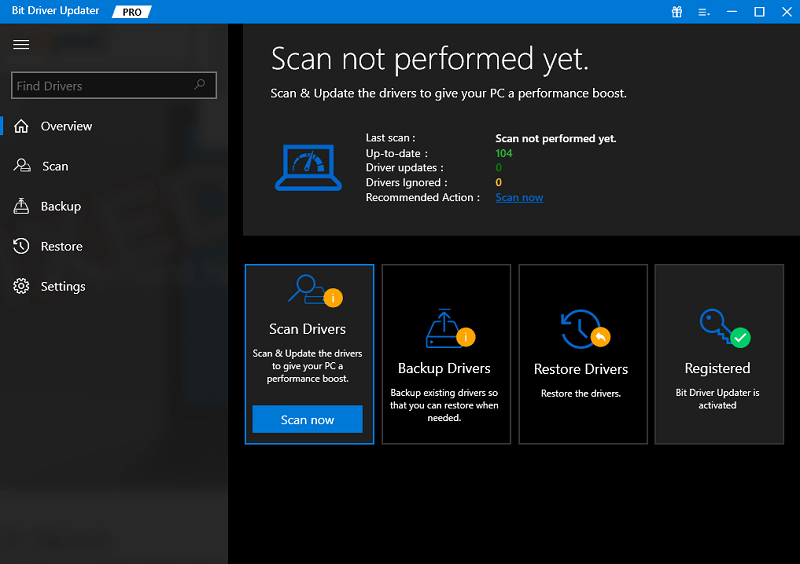
Now, let’s understand how Bit Driver Updater works: Step 1: Firstly, download the setup of Bit Driver Updater from the link provided below.
Step 2: Open the installer and follow the setup wizard to finish the process. Step 3: Once the software is installed successfully, launch it on your device and click on Scan from the left menu pane. Step 4: Wait until the driver updater scans your PC for outdated, broken, or faulty device drivers. Step 5: Check the scan results, and click the Update Now button displayed next to the Ethernet driver. Else, you can also click on the Update All button. This will help you install all outdated PC drivers in just a single click. However, when you click the Update All option, you’ll be prompted to Upgrade to the Pro version of Bit Driver Updater. The pro version also provides 24/7 technical support to its users and a complete money-back warranty but for a limited time. Also Read: How to Update Drivers on Windows 11
Ethernet Driver Download on Windows 10, 11, 8, 7: DONE
In sum, the above explained were some reliable ways that help you to search for the correct Ethernet drivers online. You can use any of them that suits you the best. But, in our opinion, you should automatically update drivers with Bit Driver Updater as it involves no risk of installing the wrong or incompatible drivers. So, now it’s time for us to bid goodbye. We hope you find this penned article useful. Please let us know if you have any queries or further suggestions regarding this document. Additionally, if you want to read more informative articles about the technology or latest tech gadgets, then do subscribe to our Newsletter. Follow us on our social media – Facebook, Twitter, Instagram, and Pinterest.


