Create Apple ID Without Credit Card
While it is possible to use iPhone without Apple ID, creating an Apple ID allows you to download both free & paid Apps from App Store and use Apple’s cloud based services like iCloud, iTunes, Find My iPhone, Photo Stream and others. Naturally, Apple expects its users would be interested in linking their Credit Card or Payment Information to Apple ID. However, there are users who do not use Credit Cards or do not want to link Credit Card to Apple ID. Such users can use the workaround as provided below to Create Apple ID without Credit Card.
1. Create Apple ID Without Credit Card on iPhone
Open the App Store on your iPhone or iPad.
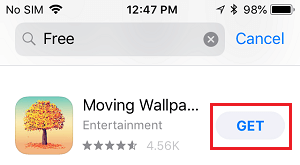
Once you are in App Store, find any Free App, Game, Ringtone or Wallpaper and tap on the Get button located next to the Free item.
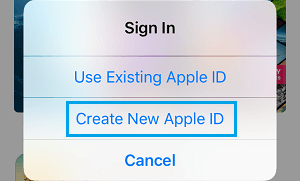
On the pop-up that appears, select Create New Apple ID option.
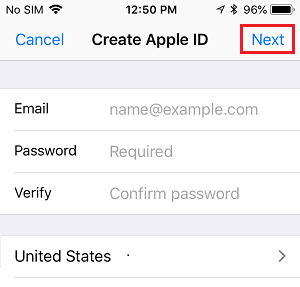
On the next screen, provide your email address, password, choose the Country in which you want to use your Apple ID and tap on Next.
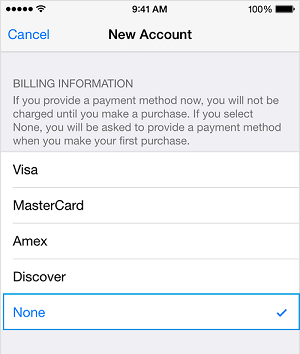
Follow the next set of onscreen instructions, until you reach Billing Information page. On this page, select the None option.
Once you have completed all the required steps, you will be asked to verify your Apple ID by email. You must verify your Apple ID before you can begin using it. Note: If the “None” payment option is not available; you can take a look at this guide: How to Enable Missing None Option On Apple ID Payment Information Screen.
2. Create Apple ID Without Credit Card on Mac or PC
Note: In order to Create Apple ID on Windows computer, you need to download & install iTunes to your computer.
- Open the App Store on your MacBook (In case of Windows computer, open iTunes).
- Search for any Free App, Song, Ringtone or anything that does not have a price against its name and try to download it to your computer by clicking on Get.
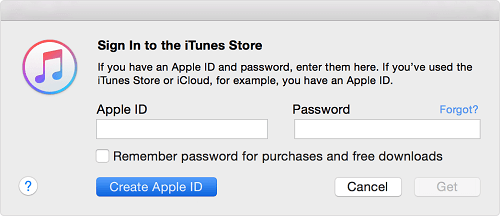
Tip: You can search for free items by typing Free in the search bar. 3. Once you try to download a Free item, you will be prompted to sign-in with your Apple ID. Click on Create Apple ID button.
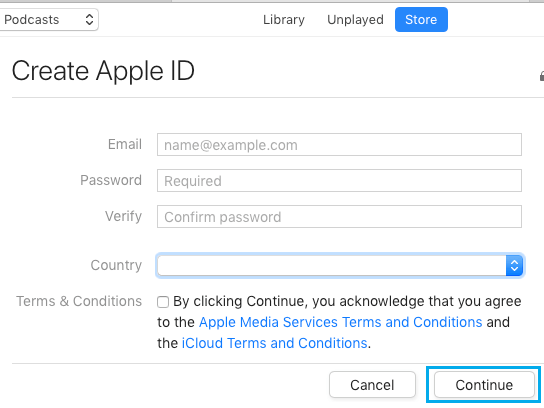
On the next screen, provide your email address, password, choose the Country in which you want to use your Apple ID and click on the Continue button.
Follow the next set of instructions, until you reach the Payment Information page. On this page, select the None option and click on Continue. After completing above steps, the last step is to verify your Apple ID by logging into your Email Account.
How to Change Apple ID On iPhone or iPad How to Change Apple ID Without Access to Email Address
