Change Desktop Background in Windows 11
When a new computer is setup, it will be setup with the default desktop background as applicable at the time for Windows 11 operating system. While the default Desktop Background might be good enough for some users, there are many users who want to customize the Desktop by using Photos of Children, Pets, Nature or simply use Solid color as the Desktop Background on their computers.
1. Steps to Change Desktop Background in Windows 11
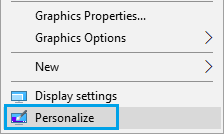
All that is required to Change Desktop Background on your computer is to right-click in any empty space on the Desktop and select Personalize option in the menu that appears.
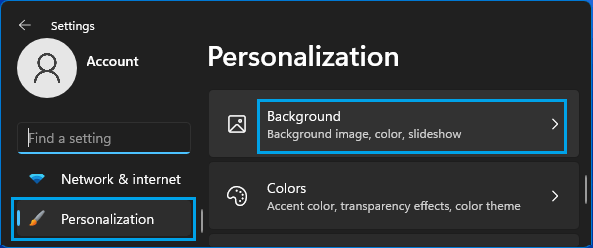
On the Personalization screen, click on the Background tab.
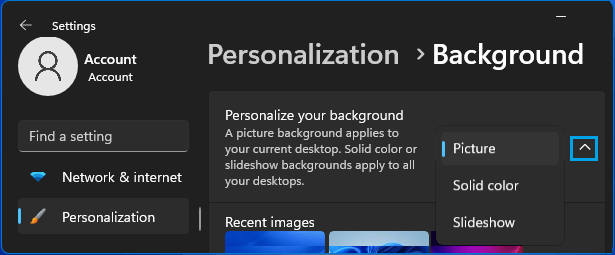
On the Background screen, click on the Down-Arrow in “Personalize your Background” section and you will see the options to select Picture, Solid Color or Slideshow as the desktop background on your computer.
Here it is worth mentioning that selecting Picture will only change the current Desktop Background, while selecting Solid Color and Slideshow will apply to multiple desktops (Current and virtual desktops).
2. Use Photo as Desktop Background
Right-click in any empty space on the Desktop and select the Personalize option in the menu that appears.
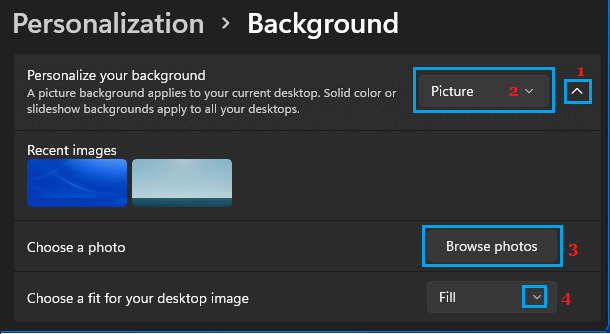
On the next screen, click on the Down-Arrow in “Personalize your background” section and select Picture as the background type. Once that is done, click on Browse Photos option.
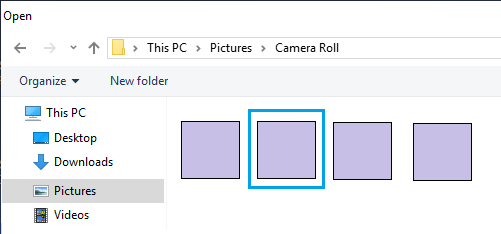
On the next screen, select the Photo that you want to set as desktop background on your computer.
After selecting background Photo, click on Choose a fit for your desktop image Down-Arrow and select the option that suits you the most.
Fill: The desktop background image will fill the desktop (image may enlarge or reduce in size) Fit: The image will be the same size Tile: The image will repeat to fill the entire desktop Stretch: Similar to fill, the image will stretch to fit the desktop Center: The image will be placed in the middle of the desktop Span: The image will span across the desktop
You can try all the options to fully understand them and choose the one that suits you the best.
3. Switch Desktop Background to Solid Color
Right-click in any empty space on the Desktop and select the Personalize option in the menu that appears.
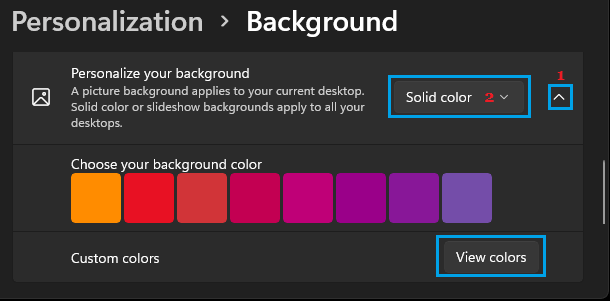
On the next screen, click on the Down-Arrow in “Personalize your background” section and select Solid Color as the background
After setting Solid Color as the Background type, select any of the 24 colors as available under “Choose your Background Color” section or click on View Colors option to create your own custom color on the next screen. Note: Having Colour as Desktop background leads to less resourc usage and makes the Desktop icons prominent and easy to find.
4. Use Slideshow As Desktop Background
Right-click in any empty space on the Desktop and select the Personalize option in the menu that appears.
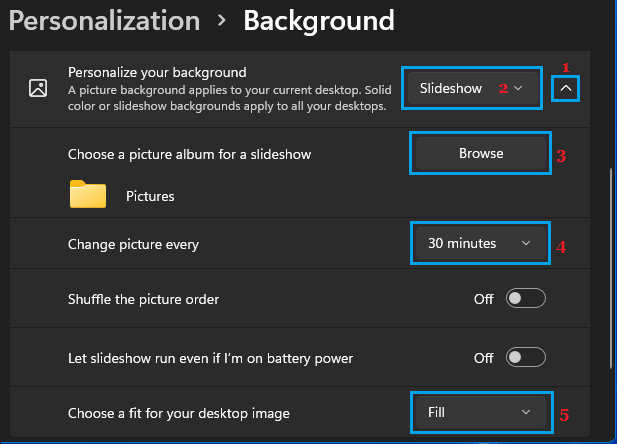
On the next screen, click on the Down-Arrow in “Personalize your background” section and select Slideshow as the background type and then click on the Browse option in Choose a Picture Album for a slideshow section.
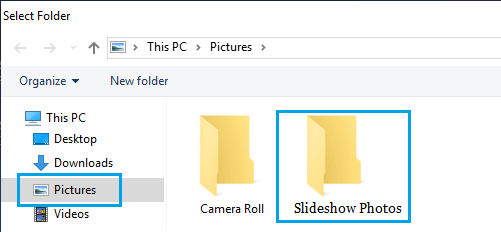
On the next screen, select the Folder containing Photos that you want to include in the slideshow.
After selecting the Photo Album, you can set the Photo change frequency for the Slideshow by selecting your desired time period under Change picture every section. You can also select whether you want the Picture to Fit, Fill, Stretch and other available options in Choose a fir for your desktop image section.
How to Change Sleep Mode Time in Windows 11/10 How to Create Bootable Windows 11 USB Drive
