Add Printer Using IP Address in Windows 10
In order to Add printer using its IP Address you need to know the IP Address of the printer. The easiest way to find the IP Address of a Printer is to print a self-test page. The self-test page will show all the details of your Printer including its current IP Address. Printing a self-test page on most printers is easy – Press the Setup button to access menus > Use the Right Arrow button to go to Print Report option and press the OK button to print the test page. If you are unable to find the IP Address of your printer, you can refer to this guide.
Steps to Add Printer Using IP Address in Windows 10
Make sure the Printer is switched ON and follow the steps below to Add the Printer to your computer.
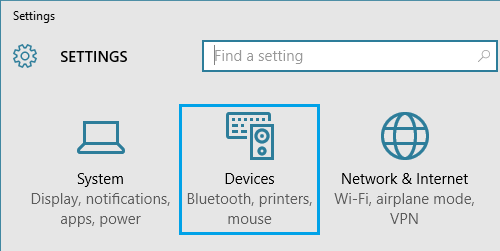
Open Settings on your computer and click on Devices.
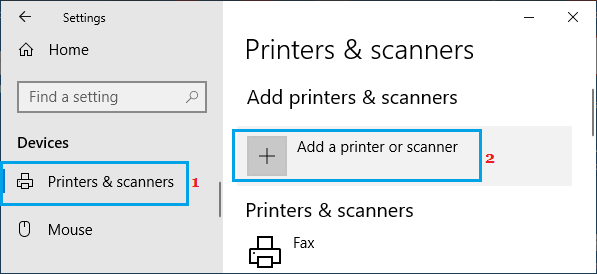
On the next screen, click on Printers & Scanners in the left pane. In the right-pane, click on Add a Printer or Scanner option.
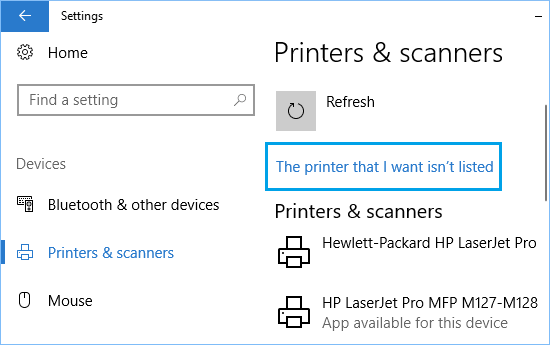
As Windows starts searching for Printers, click on The Printer that I want isn’t listed.
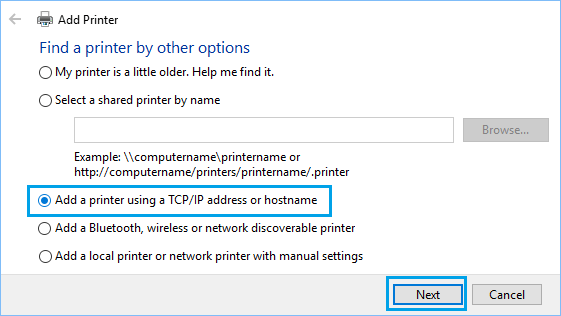
On the next screen, select Add a Printer Using TCP/IP address and click on the Next button.
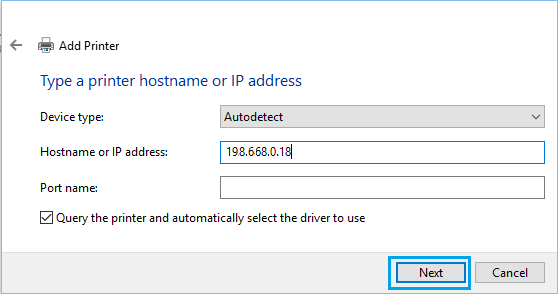
On the next screen, enter Hostname or IP Address of the Printer and click on the Next button.
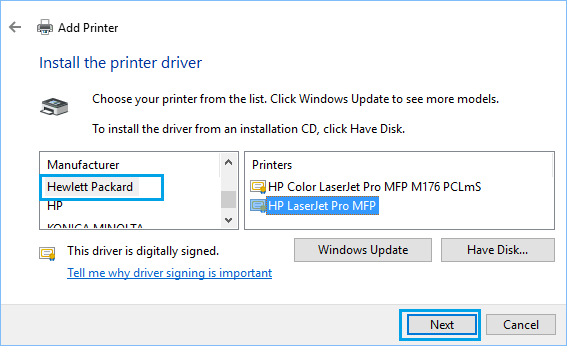
6. Windows should be able to find the printer if the printer is on and it is properly configured. If not, you may be prompted to provide more information about the printer. 7. On the next screen, select the Printer Manufacturer in the left-pane. In the right-pane, select your Printer model and click on the Next button.
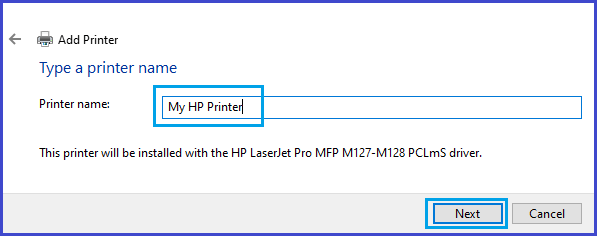
Note: Click on Windows Update button, in case your printer is missing in the list and you want to see more models. 8. Type the Name for the Printer and click on Next.
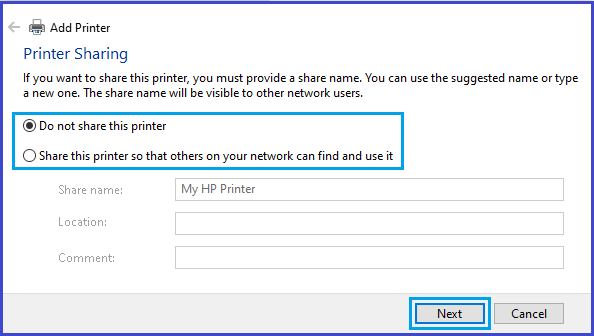
Select whether you want to Share the printer or not and click on Next.
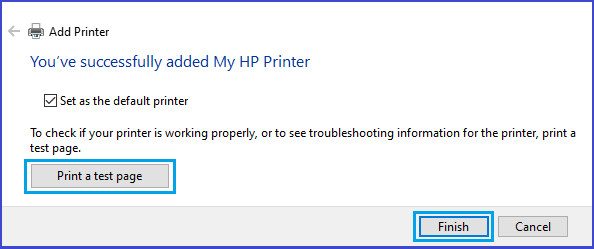
On the next screen, you can Print a test page and click on Finish.
How to Set Up Your Printer For Google Cloud Printing How to Make Printer Online in Windows 10
