Failed Network Error in Chrome While Downloading
The “Failed Network Error” in Chrome browser usually appears with an error message reading “Failed – Network Error” or Download Failed: Network Error message. As mentioned above, this error message prevents users from downloading files from the Internet, from Google Drive and other sources. This error is known to be caused by Security Software, Browser Extension/Plugins or due to certain Apps and programs, preventing Chrome browser from downloading files on your computer. In certain cases, the problem can also be caused due to presence of Malware and Rogue Adware programs on your computer.
1. Clear Chrome Browsing Data
Start by clearing browsing data to refresh the browser Cache on your computer.
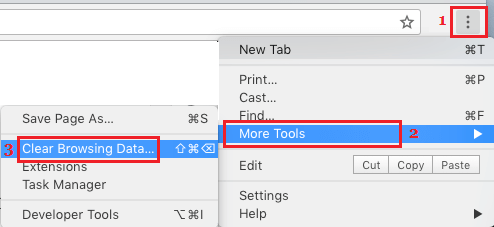
Open Chrome browser > Click on 3-dots menu icon > hover mouse over More Tools and click on Clear Browsing Data… option in the drop-down menu.
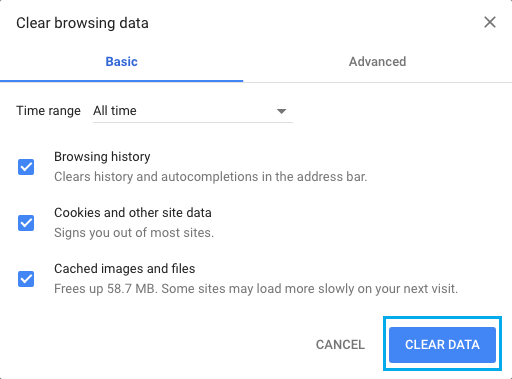
On the next screen, select All Time as the Time Range and click on Clear Data button.
After clearing browsing date, try to access the webpage and see if you are able to download the file.
2. Disable HTTPS Scanning
If you are trying to download files from Google Drive and other trusted sources, disabling HTTPS scanning in the Antivirus program should allow the download to proceed.
- Open the Antivirus Software program > Go to Settings > Advanced Settings.
- In Advanced settings, disable HTTPS Scanning or Encrypted Connection Scanning option. Now, try to download the file and see if you are still getting Failed Network error on your computer.
3. Edit Hosts File
As mentioned above, the problem can also be caused due to the Hosts File being modified by Malware and Adware programs.
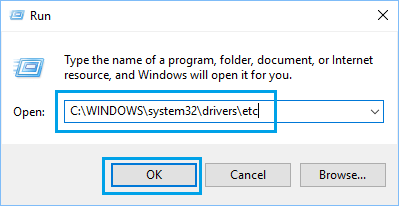
Right-click on the Start button and click on Run.
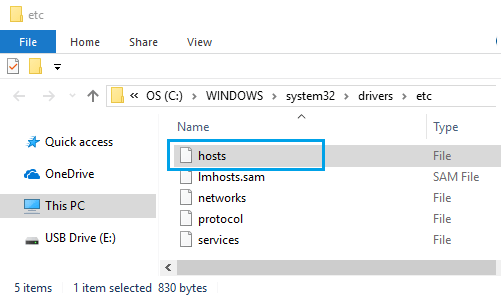
In the Run Command Window, type C:\windows\system32\drivers\etc and click on OK.
On the next screen, double-click on the Hosts File and select to open the file using Notepad.
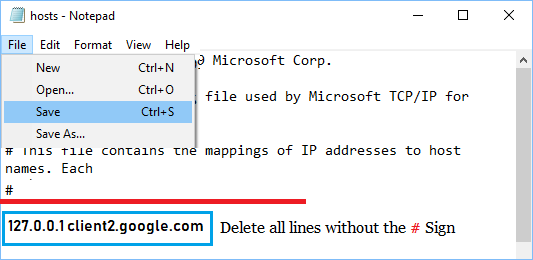
In the Hosts file, delete all lines containing 127.0.0.1 clients2.google.com entry and Save the file.
Note: If Hosts File contains no additional entries, close the editing window without saving the File. If the Hosts File has been modified, make sure you scan your computer for Malware using Windows Defender or the Antivirus software installed on your computer.
4. Reset Chrome Browser
Follow the steps below to disable Chrome Extensions and Reset Chrome browser to its default settings.
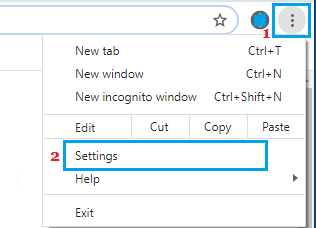
Open Chrome browser > click on 3-dots Menu icon > select Settings in the drop-down menu.
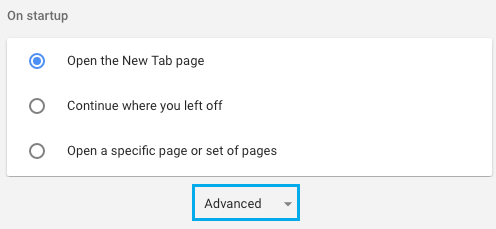
On the Settings screen, scroll down to the bottom of the page and click on Advanced.
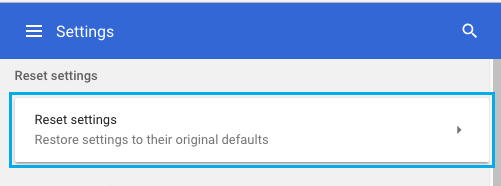
In Advanced settings, scroll down and click on Reset Settings.
On the confirmation pop-up, click on the Reset button to confirm. This will clear all settings, cookies, remove browser extensions and reset Chrome to its original default settings.
5. Remove Harmful Programs Using Chrome
Google’s Chrome browser includes a tool that can help detect and remove suspicious or unwanted programs on your computer.
Open Chrome browser > click on 3-dots Menu icon > select Settings option in the drop-down menu.
On Settings screen, scroll down to the bottom of the page and click on Advanced.
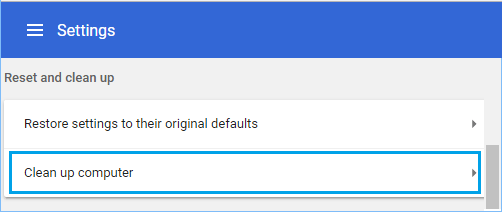
Scroll down further and click on Clean up computer option located under “Reset and Clean UP” section.
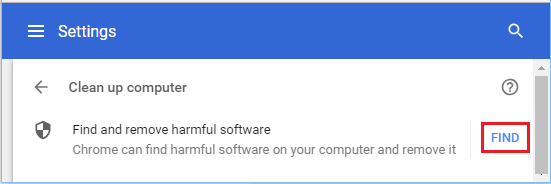
Click on Find to make Chrome browser search for harmful programs on your computer.
If Chrome finds suspicious or unwanted programs, click on the Remove option.
6. Uninstall and Reinstall Chrome
Sometimes, the User Profile in Chrome browser can become corrupted, causing Network Failed Error and other problems.
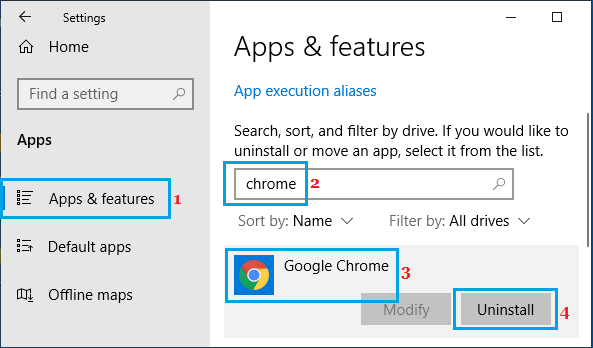
Open Settings on your computer and click on the Apps icon.
On the next screen, click on Apps & Features in the left-pane. In the right-pane, type Chrome in the search bar > click on Google Chrome > Uninstall button.
On the confirmation pop-up, click on the Uninstall option to confirm. After Uninstalling Chrome, download and install the latest version of Google Chrome browser on your computer.
How to Fix Network Changed Error in Chrome Browser How to Fix Err Connection Timed Out Error In Chrome
